So, you’re packing up your kitchen for your big move, all on your own, no hired guns for you. We’re giving you a virtual fistbump because this task is not for the faint of heart.
Since we tend to use our kitchen items for the entirety of the moving process, the kitchen is oftentimes the last room to get packed (we’re sure this has nothing to do with the fear and dread associated with packing this room up).
Packing your kitchen is a big task to tackle, not only due to the amount of stuff in your kitchen, but also because of all the oddly shaped and deceitfully heavy stuff too. And then there’s all the stuff that’s crazy-fragile, like your great-grandparent’s china and your ridiculously designed martini glasses.
So we thought we’d share with you some tips on making your kitchen packing day a success (I was going to say a delight, but I won’t push it).
Tips to Successfully Pack Your Kitchen
We mentioned that the kitchen is usually one of the last rooms packed, but it shouldn’t be. It takes a long time, a lot of packing material, and a lot of patience, so start it early. It’s easier than you think. There are tons of items in there you don’t use every day (or ever- think about getting rid of those).
Step 1: Get the Right Packing Materials
You’ll need a lot of moving supplies when you pack your kitchen. Let’s go over them.
- Cardboard boxes/storage bins. You’re going to want a handful of small and a bunch of medium sized boxes and/or bins for your kitchen pack and start with 20 in total. Get dish boxes and cardboard inserts for separating glasses and other breakables.
- Paper and bubble wrap. Get a ton. And if you have a lot of fragile items, get more. We never hear anyone say, “I wish I didn’t pack that so carefully.” You can get a lot of these two kitchen-packing staples for not a lot of money. Get the largest roll of bubble wrap you can (you’ll most likely need it for packing other rooms as well). You can use the bubble wrap to help keep safe sharp or pointy items, like knives, too.
- Packing tape and markers. After your items are safely and securely put in the boxes, use packing tape (easy to rip, easy to take off, but holds great) to keep the boxes shut tightly and write KITCHEN on each, with any items you’d like to single out underneath. Get a 3- or 4-pack of tape for the best value and we suggest snagging several markers because studies have shown that you’ll lose at least three in this process, never to be seen again.
- Moving blankets. If you’re taking your appliances with you, moving blankets are great at keeping them from getting damaged. (That goes for other pieces of furniture in your home, too, so look around to see how many you think you’ll need.)
Step 2: Pack It Up
Now that you have what you need in order to pack you kitchen with ease, go ahead and get to it. Here’s how:
Packing Your Dishes
Because plates are generally fragile, grab all that paper and bubble wrap and have them handy. Make sure the bottoms of all the boxes are taped up and ready to go and put some extra cushioning on the floor of the box.
- Sort your dishes based on size
- Cover each plate in a couple pieces of paper and use tape to keep the paper secure
- Use bubble wrap between each plate for more layers of cushion
- Place each dish in the dish box on its edge (never flat on the bottom of the box)
- Use bubble wrap to cover the first set of dishes and if the box is large enough to support another bundle, repeat the steps above
- When the box is at its dish capacity fill any voids with paper or bubble wrap (you can also use washcloths, dish towels, hot pads, etc.) to ensure the plates don’t move around
- Close the lid, tape it up, and label accordingly (don’t forget to add FRAGILE)
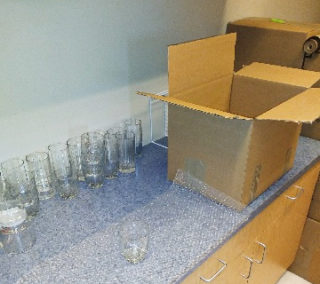
Packing Your Glasses
After you’ve completed the plates, move to the glasses and again, have all your supplies close by and your boxes ready with some layers of crumpled paper and/or bubble wrap on the floor of the box. Take care that the boxes are taped well on the bottom, too.
- Wrap each glass carefully with paper, making sure you get inside the glass, as well and use tape to secure the paper
- When packing stemware use bubble wrap around the stem for cushion and tape well so the stem doesn’t fall out of the wrapping
- Put the glasses in the box with the drinking side down, if you’re using the separator inserts here, you should still follow this rule
- Once the box is full, use extra paper (etc.) to fill the voids and ensure the glasses stay in place
- Add one last piece of bubble wrap to cover the top of the glasses and close up with tape before labeling the box (add FRAGILE- this will let the moving company know the box contains breakable items).
Packing Your Utensils
Things are about to get a bit easier…
- Sort your utensils out in their respective categories
- Grab a couple pieces of paper and a handful of utensils (6-8) and wrap the handful in the paper securing tightly with tape
- Add the utensils to a previously made up box, close with tape and label
- For sharp knives- put the edge of the knife handle on two pieces of paper and start rolling diagonally until the knife is wrapped and covered in the paper
- Take the next knife and position it in the opposite direction of the previous knife (blade facing the other way) and roll in the same manner
- Do this until the paper sheet is used (around five knives should fit in this bundle)
- If you need extra safety, wrap the bundle in bubble wrap
- Tape the paper and/or bubble wrap around the knives and place in box, then label
Packing Your Kitchen Appliances
Small Appliance Packing
Yes, they come in all shapes and weights and sizes, but your small kitchen appliances are pretty manageable to pack.
If you have the original boxes they came in you’re winning because those boxes are made for those items and will provide great security during your move. However, if you’re like most of us, you don’t have the original packaging.
Before packing your item, wrap it based on how much protection it needs (maybe just a couple pieces of paper will do, but you might need bubble wrap for the next item).
Place each item in a box that’s as similar in size as you can find (these may be found in plastic storage bins, shoeboxes, perhaps even decorative boxes- use your imagination) and fill any empty space within the box with paper, bubble wrap, or any other way you’ve come up with to keep the item from moving around.
Depending on weight, feel free to put a few of these small kitchen appliance boxes inside a larger box and don’t forget to label.
Large Appliance Packing
If you’re completely tied to moving your large kitchen appliances to your new home (take into account the time and money spent to move said items) it’s really smart to hire help. These large appliances are heavy, bulky, and expensive, so if you’re going to do it, be sure it’s done right.
But if you have some friends who owe you big-time and you think you can manage moving the large appliances together, you’ll want:
- A dolly or two
- Moving blankets
- Furniture sliders
- Packing tape
- Tape measure
- Work gloves
- Back braces
- All that brute strength
Make sure you can get through doorways and hallways (use tape measure first), make sure you tape all doors and drawers shut before you move the appliance, tie up any loose cords that could trip you up, wrap the appliance in a blanket, and carefully slide or pick-up the appliance, moving at a safe speed.
The Takeaway
Kitchens are intimidating. They house a lot of stuff and much of it is fragile, so we get that it can overwhelm you. Try not to let it. Take it one cabinet at a time and you’ll be done before you know it. If you have to, pack the wine glasses and beer mugs last.
We hope you have a great move and if you’d like any help with that, we’re here. Call us today.